Vintage Wallpaper Embossed Metal Tissue Box Cover
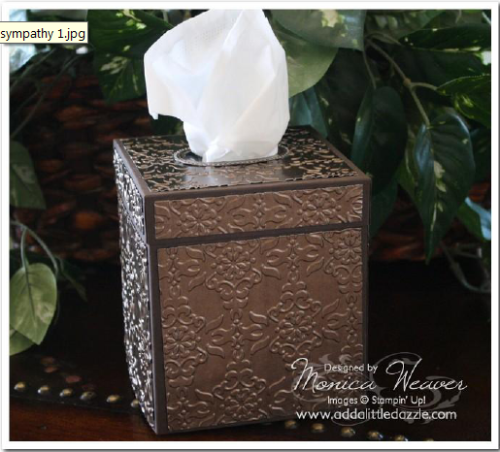
Vintage Wallpaper Embossed Metal Tissue Box Cover is a beautiful Home Decor Item. I have seen these tissue box covers all around the internet for a long time but nothing that has incorporated embossed metal sheets. This is our exclusive idea and we are loving these boxes.
 Tissue Box Covers have been around for a long time. Many of us can recall the days when our grandmothers made tissue box covers using plastic canvas. I am happy to say that we have come a long way and crafters have taken tissue box covers to a new level. Although I love all the tissue box cover projects I have seen on the internet, I wanted to create a tissue box cover using Add a Little Dazzle Craft Metal Sheets. In order to do this, I pulled out my favorite Stampin’ Up! product the Big Shot and used it to beautiful emboss metal.
The embossed image was created using the Vintage Wallpaper Impressions Folder and the Designer Frames Impressions Folder. The base of the box was created using Early Espresso Cardstock and the panels were created using Add a Little Dazzle Brushed Bronze Craft Metal Sheets. This tissue box is so elegant and will beautifully decorate any room in your home or office.
Add a Little Dazzle carries craft metal sheets in an assortment of colors. As you can see from this picture, the elegance created using craft metal sheets is permeated all over the Tissue Box Cover. The lid of this tissue box is not only embossed with the Vintage Wallpaper Impressions Folder, but I have also embossed the opening with the new Designer Frames Impressions Folder. This finishing touch surely adds an elegant and sophisticated touch to this box.
If you want to have the embossed metal sheet color come through, you can sand it in a circular motion. It is important that once you have sanded the craft metal sheet that you clean off the residue with a tissue paper. This will remove the dullness and allow the beauty of the embossed metal sheet to shine through.
Another important thing to remember is that you MUST use Sticky Strip to assemble this piece. Not only on the metal pieces but in the center oval to ensure it all attaches well and doesn’t come apart when you pull out a tissue paper. A free pdf file tutorial with detailed step-by-step instructions can be found by clicking on the link below. What a great Decor Item for any room in the house or office.
CLICK HERE to purchase Stampin’ Up! product and CLICK HEREto Shop Our Boutique!


Alfred Houghtaling
Say, you got a nice article.Really looking forward to read more. Keep writing.
Love this! I can always pick out your items! They are distinctly classy!
The tissue box holders turned out beautiful!’Thanks for the tutorial!
Kristi
Oh my goodness–I thought the first one was beautiful, but wow, the red one is outstanding!
Monica, the tissue box is gorgeous. Thanks for the free tutorial. I think it would be very pretty for Christmas using the Petals-a-Plenty EF and Barn Red Metal Sheets.